|
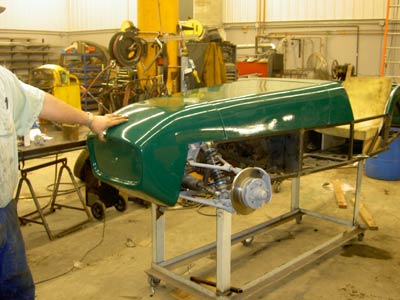
The first
body panel we fitted is the nose cone. You could just as well start
with the boot section as it is to be fitted next and its location
is not affected by the nosecone.
This is
the only panel that needs the Dzus fittings. And even then they
could be exchanged for screws if quick access is not wanted to the
parts under the nose. With our placement of the radiator just ahead
of the engine we will not have to remove the nose to check the coolant
level. However we are going to attach the grill with Dzus fittings
so we can use the space just inside for tool storage.
First
be sure to place some shims on top of the frame of about the same
thickness as the flanges on the side panels. Next notches will have
to be cut were the frame protrudes from the sides. Use a sharpie
marker to draw a cut line and cut and fit with care as this cut
will be visible in the finished build.
Notches
will have to be cut for the two upper Dzus fittings (see Pictures)
These notches will have to be extended about 3/4" farther to
the rear to allow the nose cone to clear the Dzus brackets. This
notch will not be visible from outside. The Dzus bracket is bent
so it lies flat against the nose or else the Dzus fastener will
crack the fiberglass of the nose.
The easiest
way to insure alignment is to fasten the Bracket to the nose before
tacking it onto the frame. After everything is tacked remove the
nose and finish welding.
The same
technique will be used for the lower bracket. A notch is also cut
from the nose flange to facilitate easy removal. (See picture)
|